Fabric Buttons
One aspect of 14th century clothing that immediately comes to mind is - buttons. Lots of them. Buttons on the fronts of garments, on sleeves, on collars, on hoods... the list goes on and on. Here is a little back story on fabric buttons and how I make them. Enjoy!
Buttons of various materials were used throughout the medieval period, but the cost rises quickly when they are metal or precious materials, both then and now. Buttons from the 14th and 15th centuries can be seen on effigies, in illuminations, and have been found in multiple archaeological excavations.
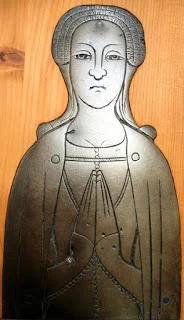
Isabel de Malyns, with buttons on the front of her dress and sleeves, 1385. Courtesy of the Medieval Combat Society

Man with buttons on the front of his garment, late 14th century. Grand Chronique de France, British Library, Royal 20 C VII, f. 22v

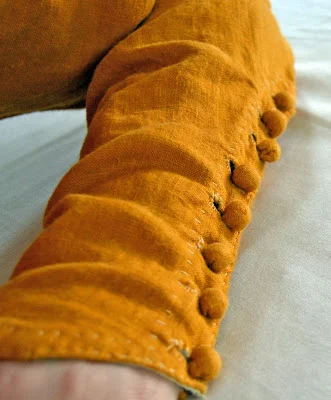
Buttons on a sleeve from excavations in London, 2nd quarter of the 14th century. Museum of London: Textiles and Clothing, Plate 1
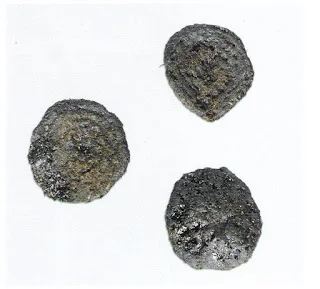
Buttons from excavations in Greenland with concentric rows of stitches. Some buttons found in London also have the same treatment. Herjolfsnæs Churchyard, possibly 1380-1530. Else Østergård, Woven into the Earth, p170
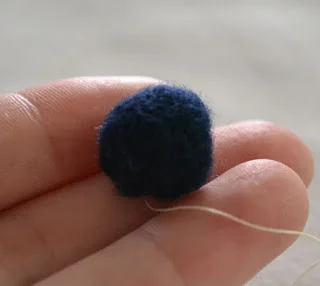
The most cost effective way to add miles of buttons to your clothing is making them from fabric. You can make lots of these little round balls from only a small amount of scrap material.
'Self-stuffed' buttons are the easiest to make and I find they are suitable for the majority of situations. With a bit of practice, creating fabric buttons is quick and easy. They can be made of any material: linen, wool, or silk.
Here is how I make my fabric buttons. Good luck and have fun!
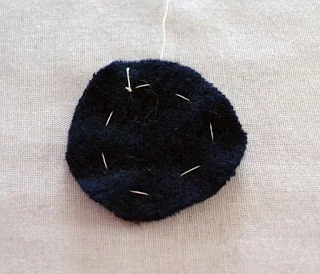
Cut a circle of fabric (finding the right size circle to start with can take some trial and error). Sew a row of running stitches around the circle. Placing your row of stitches closer to the edge is useful if your fabric is very thick:
Gently pull the thread to draw the circle in and push the edges of the circle into the center "bag" that forms with your finger:
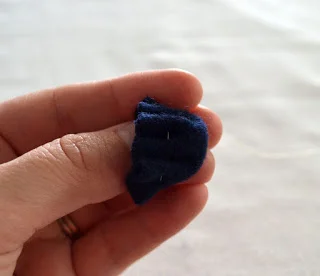
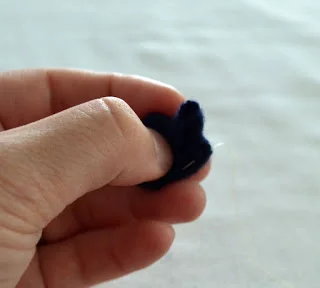
Here is the button with the edges about half tucked in:
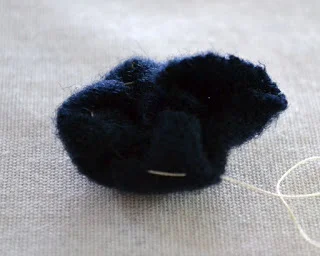
Work your way around the circle until all the edges are gathered inside:
Close up the button with several stitches across the bottom:
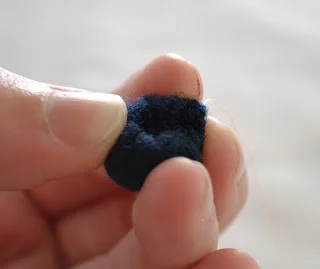
While closing the button, you may need to work it with your fingers into a round ball.
That's it!
Now that you have a button, how do you attach it to your garment?
Glad you asked!
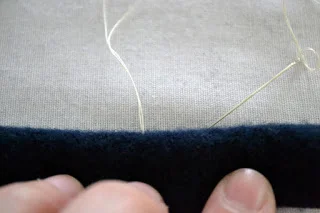
Bring your thread up through the edge of your garment:
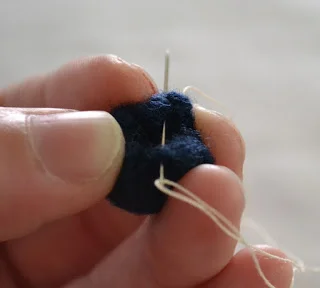
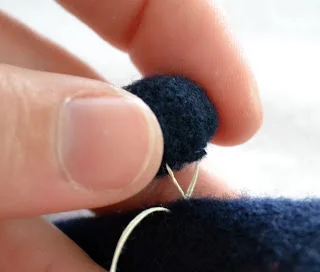
Pass the thread through near the base of the button and back into the garment to form 'loops.' Sew as many as you need to make the button secure. You will want to pull the threads tighter than in the image below:
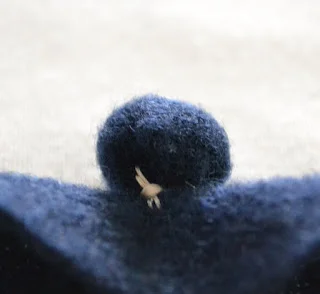
Wrap the thread around the stitches several times. This creates a shank for the button:

Tie off the end and you are done!
Repeat until you have as many buttons as you desire!
(If you are as in love with Pinterest as I am, you may like this photo montage of the process)
